Setting up Plane Plotter on a 3 Mi-Fi device
The first thing you need to do is to determine the IP address of the Mi-Fi
device.
Use the ipconfig
command from the command prompt, and look for the address
of the Default Gateway
device:
C:\>ipconfig

Windows IP Configuration

Ethernet adapter Local Area Connection:

        Connection-specific DNS Suffix  . :
        IP Address. . . . . . . . . . . . : 192.168.1.100
        Subnet Mask . . . . . . . . . . . : 255.255.255.0
        Default Gateway . . . . . . . . . : 192.168.1.1
In this example, it's 192.168.1.1 Convert that into a URL
by adding http://, and
enter it into your Web Browser:
http://192.168.1.1
You should be rewarded with the opening page of your Mi-Fi device. This is what mine looked like:
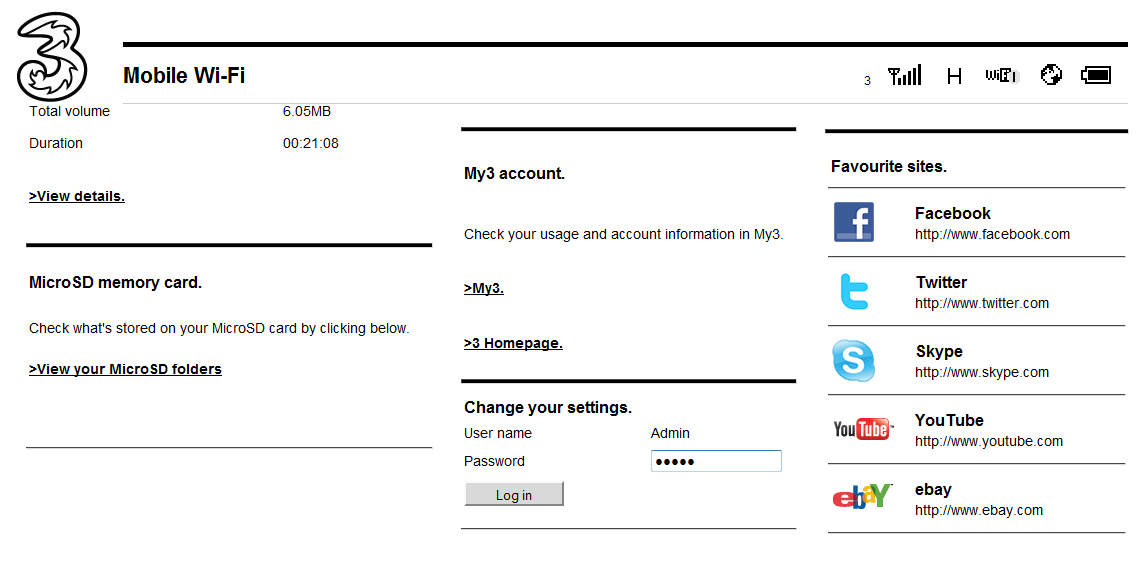
Enter the Admin password, and press the Log in
button.
You should get the screen below.
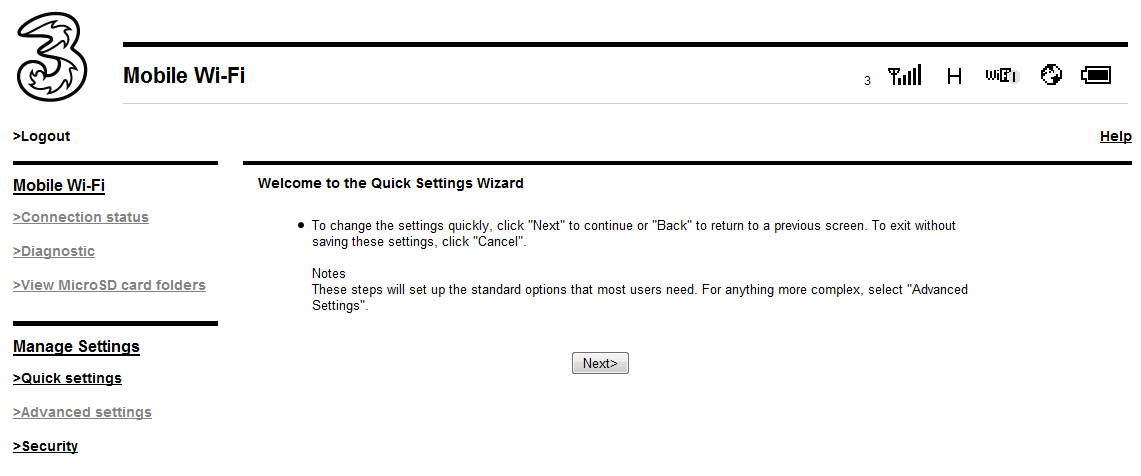
You will get a set of choices listed on the left-hand side of the
screen,
and you want the Security option. Click on
it.
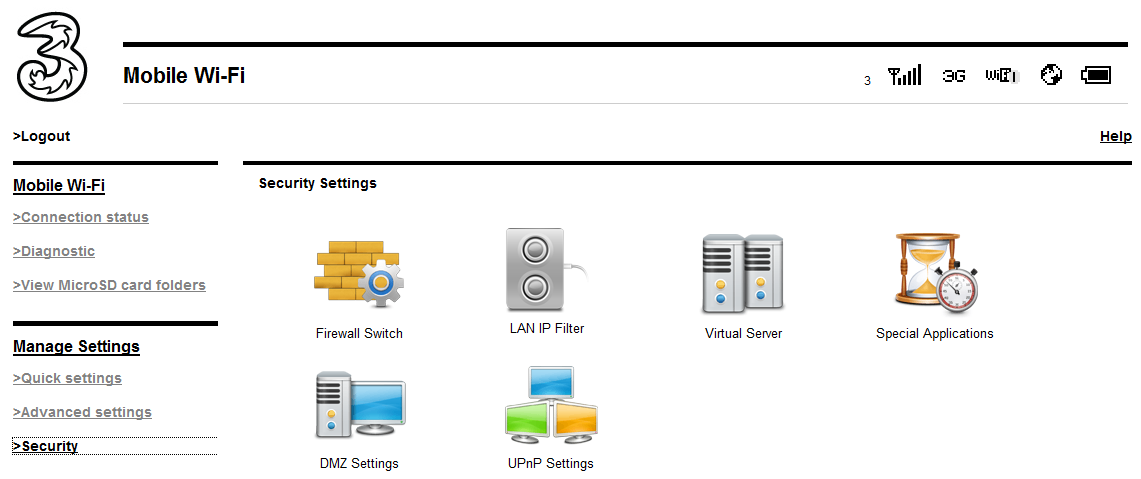
Now click on the Special Applications icon,
and you should get a set
of options to add a special application, and a list of any existing apps.
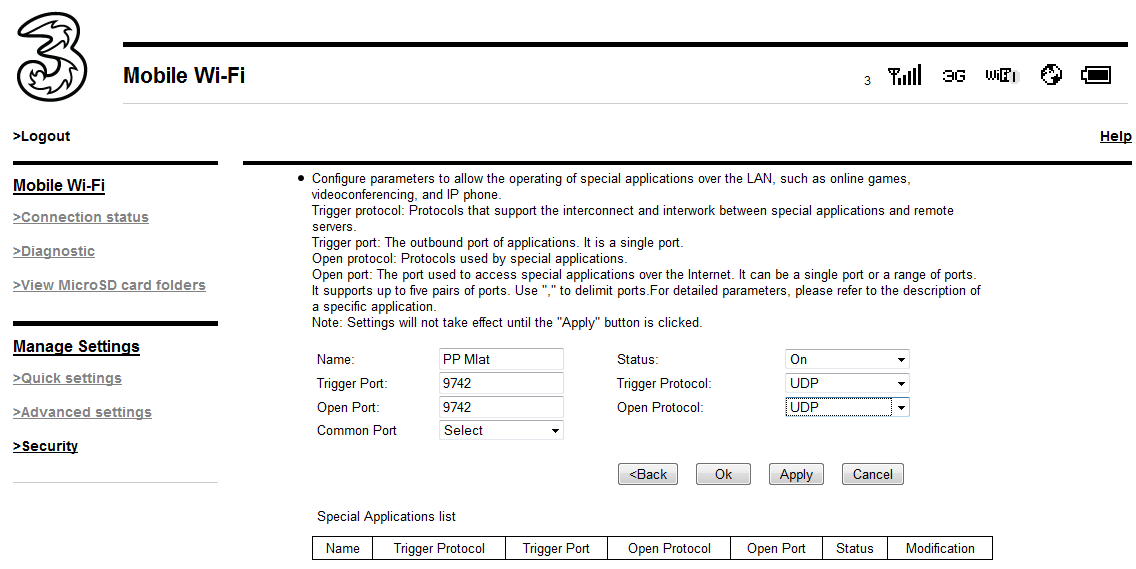
Complete the details for the new Plane Plotter Mlat application:
Name:  PP Mlat
Status: On
Trigger port: 9742
Trigger protocol: UDP
Open port: 9742
Open protocol: UDP
and click on the Ok button.
You should now be able to complete the Plane Plotter, Test Networking, Check GS/MU functions.