


|
|
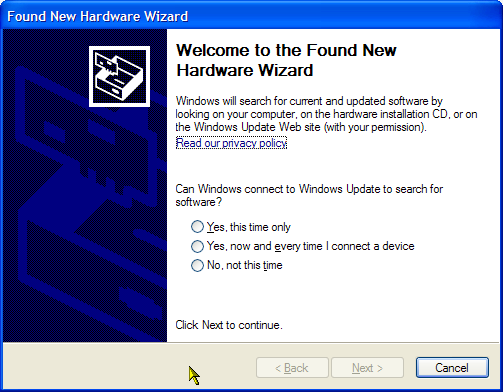
Installing the Dexatek softwareBasically, you follow the instructions in the box. Note that the DVBWorld software had a very similar set of prompts. [Instructions for checking that the USB 2.0 is set to use hi-speed drivers should be here - see the PDF manual on the disk. Unlikely to be relevant to a modern PC running Windows Vista or Windows-7.] Connect the powered-up USB box to your PC. Please make a note of which USB port you used, and be sure to use that same port every time. Otherwise the PC may think that you are plugging in multiple items, and not be able to associate your hardware with the correct software! You will get a warning dialog about a new device being discovered. Press the Cancel button. At several places throughout this guide you will find screenshots from both Windows Vista and Windows XP systems, to help you whichever OS you are using. Windows-7 screenshots are very similar.
Next, obtain your installation file. There is one on the supplied CD, or you can download the latest software here. At the time of writing, the latest drivers and application software for Windows Vista were the "DK5702 - 20071107 update Vista Driver and updated application pack" files. This is actually a RAR format file, and requires the UNRAR utility to unpack it. Use a command such as: unrar x *.rar to expand the downloaded files into a set suitable for installation. This should result in a directory V2.0build02_20071102 Dexatek containing a number of files and directories, including the all-important setup.exe.
64-bit driver issues with Windows-7On 64-bit Windows Vista, quite a few drivers appear to work correctly, including.
However, there appears to be an issue with recent DVBWorld drivers on 64-bit Windows-7. The following drivers have been reported to work - yes, they are all older drivers rather than the most recent release. My thanks to Alberto Re, Ferdinand Valk, and Ian Deans for these reports and for testing some drivers which did not work.
Ian Deans comments further in this Yahoo MSG-1 message:
64-bit driver issues with Windows-8On 64-bit Windows-8 signed drivers are required, in addition to the correct combination of drivers mentioned above. The following is a summary of an exchange between Arne van Belle and Graham Woolf. Arne: I run version V2.0 from 20080415 successful on 64 bit W7. Later versions only gave me problems and did not add anything for data reception. I suggest running the 20080415 driver, which can be downloaded in the Zip archive here. Make sure you remove the V3.0 software and drivers first as Windows might refuse to install older drivers over the newer ones. Graham: Success! Those drivers that you supplied the link for are now working successfully on Windows 8 pro 64 bit. It was all very straightforward in that I just used your drivers and then added the EKU and TelliCast software from the EUMETSAT CD. Graham continues by noting the steps required to get Windows-8/64 to accept unsigned drivers:
This is a once-off procedure - you only need to do this while carrying out the driver installation. DJT notes: I also needed to disable driver signing, and found a way of permanently disabling it on Windows-7. Ferdinand Valk notes: [My latest PC] runs Windows 8, 64 bit. It has an Intel i7-3770 CPU 3.4GHz, 4 cores; RAM 8GB. I connected an external DVB World USB2 receiver to a USB 2 port. USB3 doesn't produce a reliable data stream. This receiver will be replaced with a new one (same type) as the Strength/Quality readings are nonsensical, but its operations are fine. I just don't like to take chances. The DVBnet ETA adapter driver is 6.3.0.1 dated 2009-07-05 The USB DVB-S2102 device driver is 1.0.0.6, dated 2008-03-20. The DVB World software is 3.1 B01 (2009-09-29). USB 3.0While testing on a new Windows-8/64 system - PC Stamsund - I
found that the steps Graham described worked nicely, but with the Dexatek box
plugged into a USB 3.0 port the missed packet rate was extremely high, several
thousand packets an hour, producing an unworkable system. Thanks to a
suggestion from Arne van Belle, moving to a USB 2.0 port appears to have
completely solved that issue. What's more, moving the port didn't result
in a fresh device install, which might have required a different network address
for ease of configuration. Ferdinand Valk also found that USB3 doesn't produce a reliable data
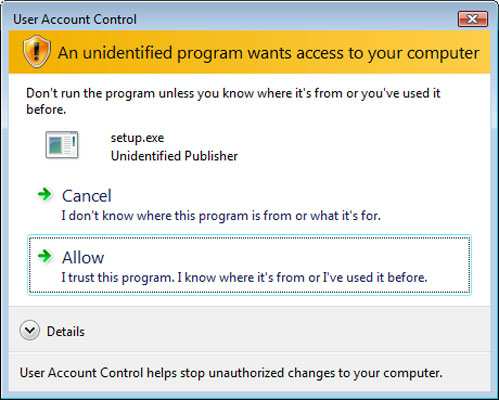
stream (as noted above). Continuing the installationDouble-click on setup.exe to start the install process. On Windows Vista and Windows-7, you may be prompted to authorise the program to continue, unless you have disabled the User Authorisation Control (UAC) [not recommended]:
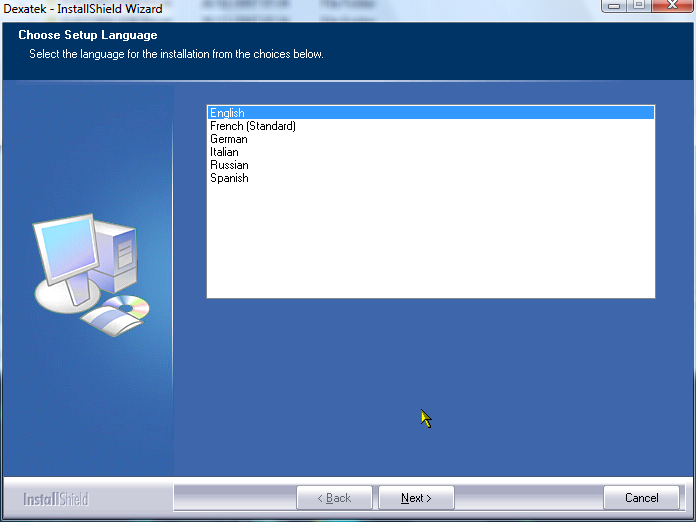
Follow all the steps in the Wizard. Please note that not all the screens you will see appear in the following section. First, choose your language:
After allowing the installation to proceed, ensure that both Drivers and Software are checked:
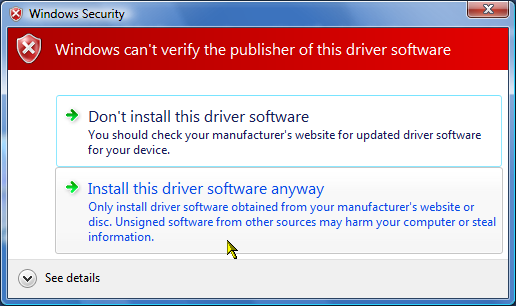
At two points in this process, you will get a warning that the drivers are unsigned. The dialog looks a little different on Windows Vista and Windows-7 compared to Windows XP. Click on the "Install this driver software anyway" box or "Continue anyway" button:
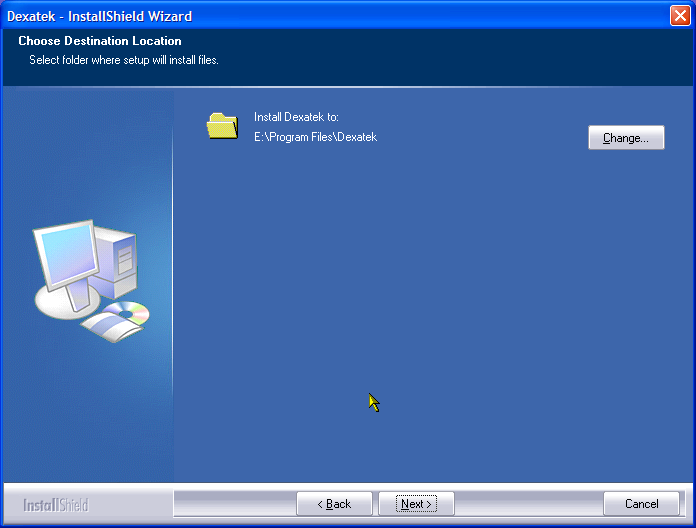
On Windows XP, I suggest the default installation location. Note that in the system I used for testing Program Files happens to be on drive E:, as you can see in the screen-shot below. On my Vista system I actually installed to C:\Tools\Dexatek\
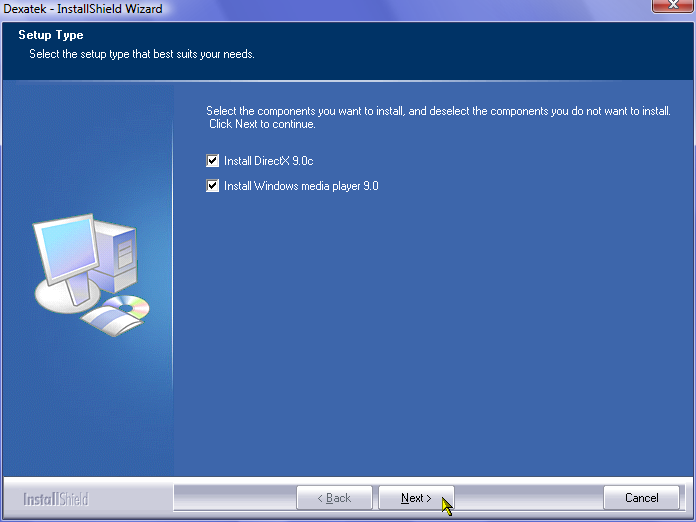
You will be prompted to install older versions of the Windows Media Player and Direct-X. Have both checked and press Next. Those components won't be installed if your PC doesn't need updates.
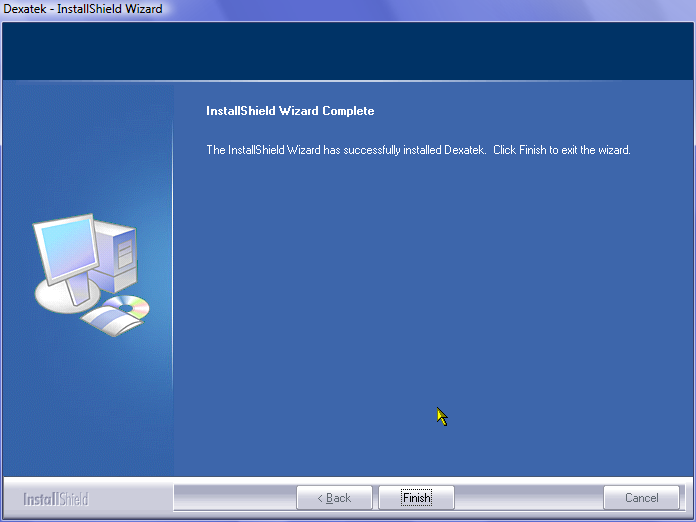
If all has gone well, you should get a successful installation:
Now reboot the computer. The manual notes: "If you are using a USB2.0 adapter PCI card/PCMCIA etc. to support the USB2.0, please turn off the USB Box power before you restart the computer. Please restart your computer directly if USB2.0 supported by motherboard." If required, power-up the USB box once the computer has started. You may see messages about new hardware found, installing drivers, and the device being ready for use. I'm not sure whether I saw that on my system, though! Setting up the Dexatek softwareNote that the DVBWorld software had a very similar set of prompts. For TV operation - do this firstThe next steps are to select the satellite and transponder we want to connect to, and to configure the data connection for EUMETCast use.
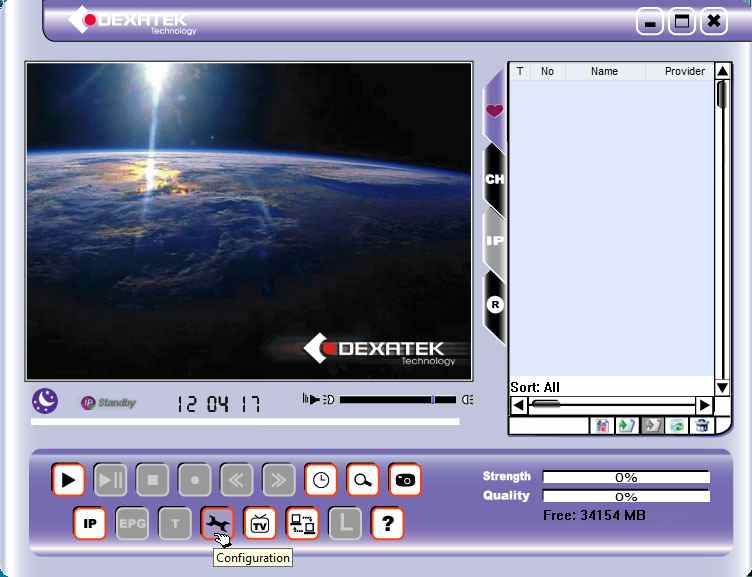
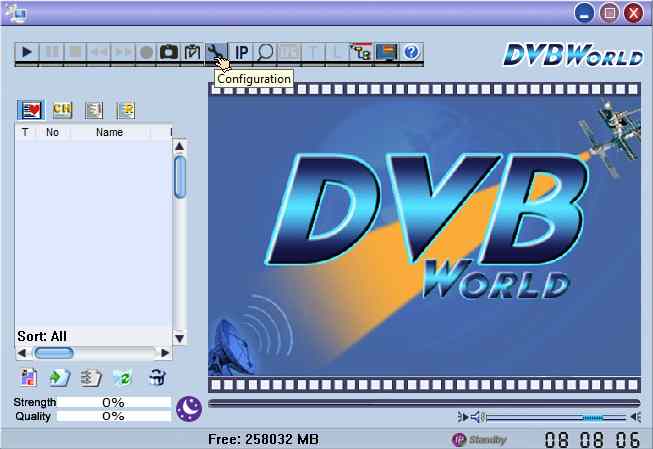
Double-click the
Dexatek icon
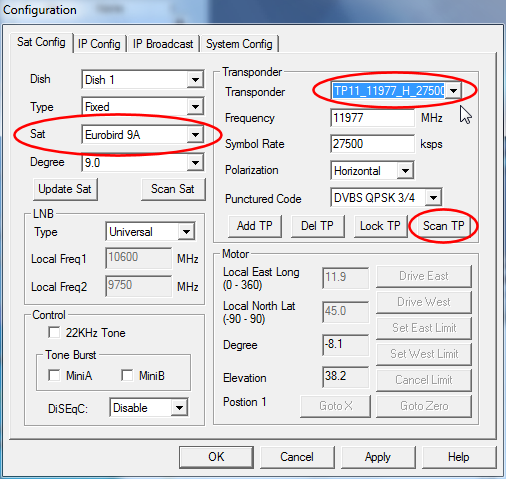
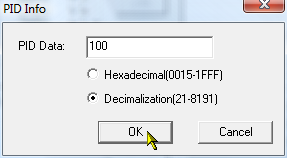
Note the spanner-shaped configuration icon on the bottom row. Click it, and use the drop down lists to select the satellite as Eurobird-9, and the transponder as TP14_11977_H_27500.
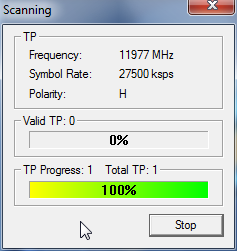
If you have a more complex LNB setup, you may also need to configure the DiSEqC parameters, but for my simple setup Universal LNB was all I needed to select. For our application, there is no need to scan the whole satellite (Scan Sat). Press the "Scan TP" button to scan the selected transponder for the active TV and radio channels.
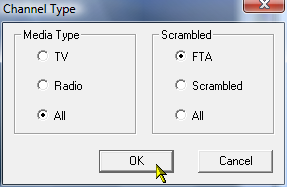
After scanning a transponder, you are presented with a choice of what to make available. Select All, FTA (Free-To-Air).
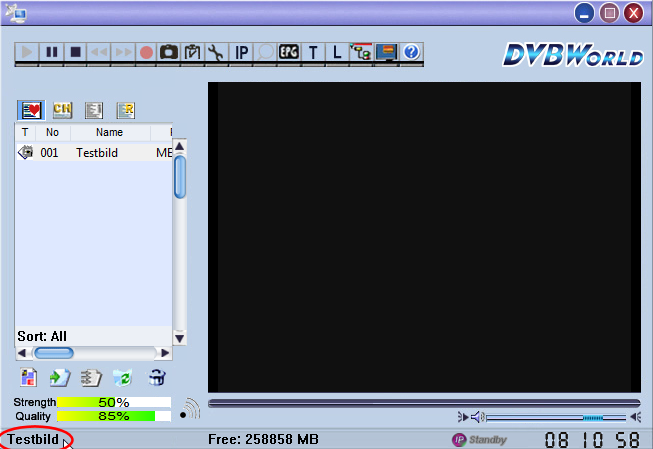
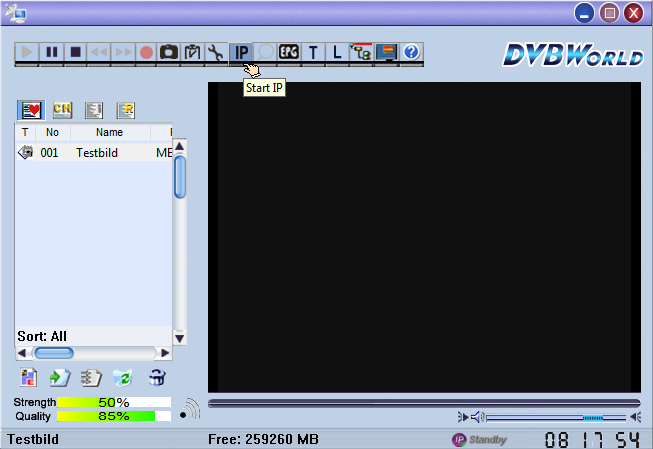
You should be able to select and view TV channels by double-clicking after doing this. On the Eurobird-9A transponder, there may be a single "TV channel" with the name of "Testbild", although it may be a different station as these do change from time to time. Note how the name is displayed on the status bar of the DVBWorld screen-shot below.
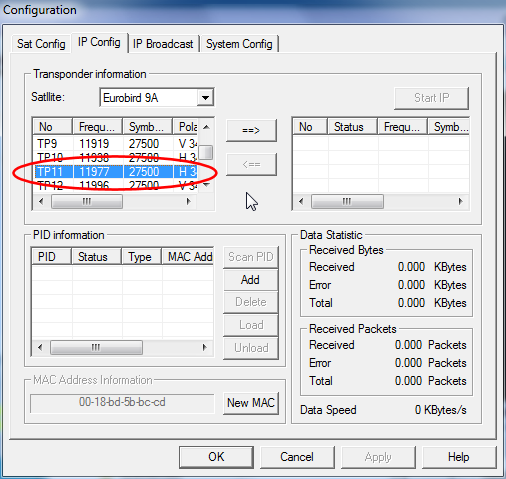
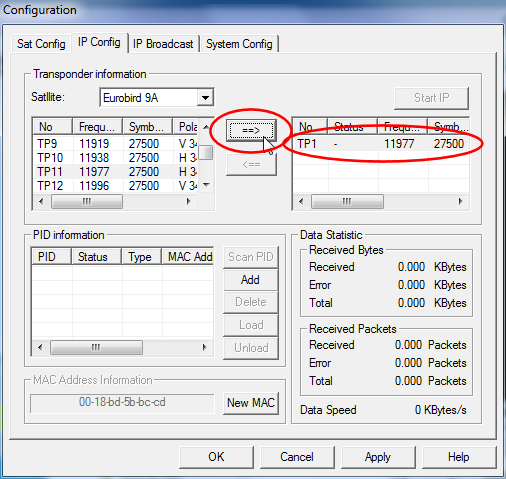
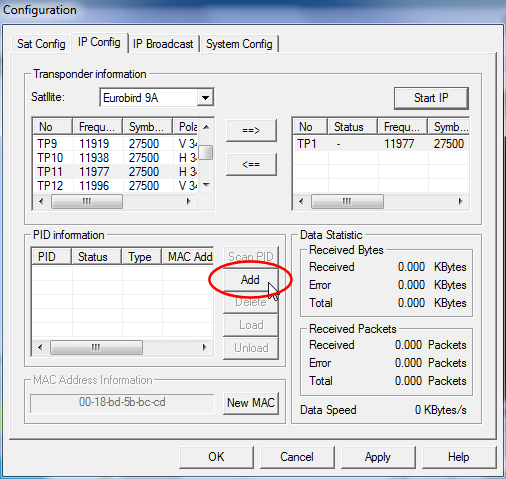
Setup for data operation - do this after the TV setupClick on the configuration icon again to select the configuration dialog, but this time select the IP Config tab. There are a number of steps to setting up the data operation.
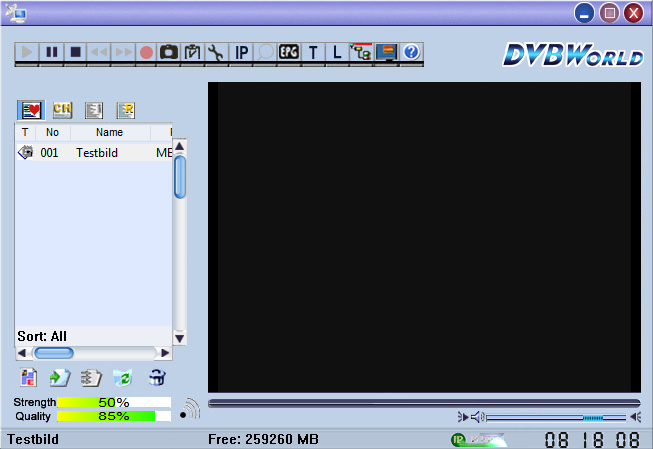
To start the data flowing, you can press the IP button in the toolbar.
Note that the IP is shown as flowing by the IP symbol changing from red "standby" to green "running" at the right-hand-side of the status bar.
I get a "COM Surrogate has stopped working" messageIt seem that some of the video codecs supplied with both the Dexatek and the DVBworld software don't play well with Windows. If this happens to you, locate the directory containing the Dexatek or DVBworld software, and rename these two files: M2AToM1A.ax => M2AToM1A.ax.renamed This does not appear to stop the video recording function of the Dexatek software. Final tweaksBe sure to leave the TV software with a 24-hour working channel selected, otherwise when you first start in the morning the signal strength amy show as zero, and no data will flow when you press the IP button. My thanks to Ian Deans for his valuable suggestions for improving this page after testing it out on his own installation. |
|
|