


![]()


|
|
Receiving & automated processing of Sentinel OLCI dataIntroductionPlease note that this is preliminary information, based on my own reception. I found that using a separate hard-disk (not SSD!) for the HVS (High Volume Service) data resulted in less data loss, but I'm not using a RAMdisk at the moment. I receive and process the Sentinel 3A data automatically, and then use the EUMETCastView program if further processing is required. For the Sentinel 2A data, please see this page. You an get the data either in near-real-time over EUMETCast, or you can download it from the Web using, for example, EUMETSAT's Copernicus Online Data Access (CODA) or ESA's Data Hub. Downloading the dataYou can view the data with either ESA's SNAP toolbox, or EUMETCastView. The program EUMETCastView currently requires a .TAR archive format, but the data downloaded from the Web is in .Zip format, so a simple conversion step using the 7-zip file manager is required. Briefly:
Once you have the data in a .TAR format, you can use the EUMETCastView program, or the method outlined below for processing. For an introduction to the EUMETCast View program, please see GEO Quarterly number 53.
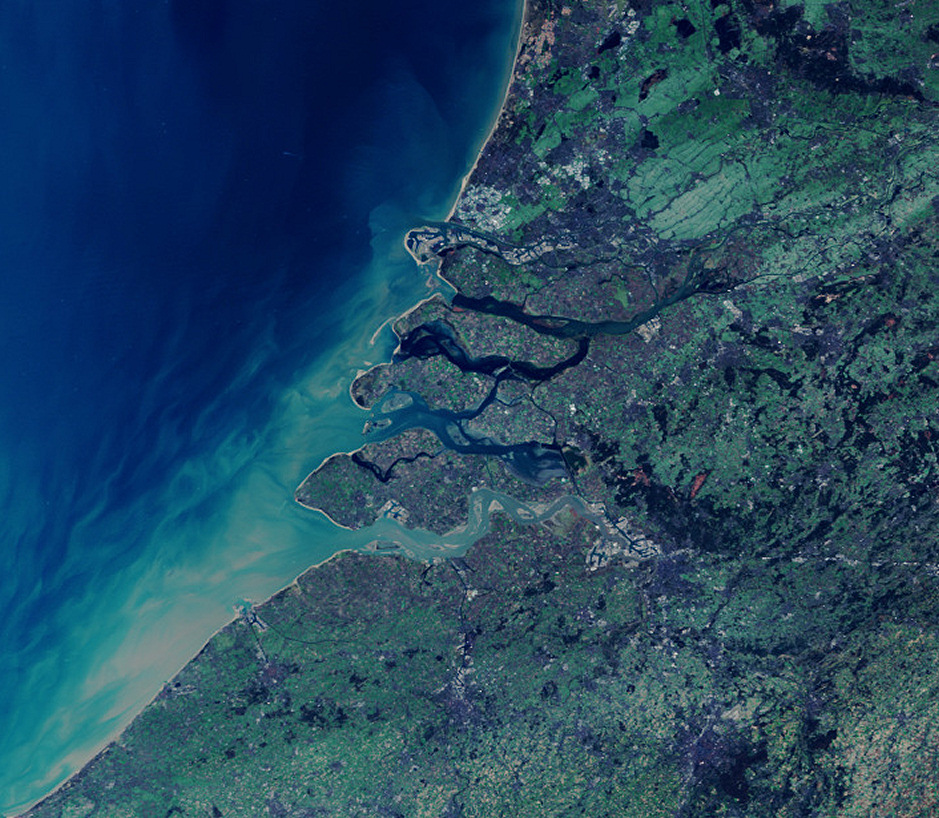
Receiving the data over EUMETCastLicenceFrom EUMETSAT obtain a licence for receiving the data, and register at the EO Portal for the "EUMETCast satellite". Select Copernicus, Copernicus Sentinel-3 (High Volume Service), OLCI Global Level 1. You will see that both "Full resolution NRT" and "Reduced resolution NRT" are available - full is 300 m resolution and reduced is 1.2 km resolution. The image below is from the full-resolution NRT (near real-time) data. There may be a licence charge for commercial use of the data. You will also need the eToken (USB dongle) and TelliCast software, and if you don't already have these EUMETSAT can supply at a nominal charge (�100). HardwareAntennaBasically, you need a "satellite TV" dish and LNB. Within much of Europe an 85 cm dish will suffice, but outside the central region of the EUTELSAT 10A coverage, for example in Scotland, you may need a bigger dish. Arne van Belle has tested a number of LNBs and the Inverto Black came top. The HVS (high volume service) itself is a faster data-rate service than the BS (basic service), which means that a better signal is required. One consequence of this is that if your HVS signal is marginal, the receiver may get errors when the signal is low (rain, ice-crystals, high-winds etc.), and those errors will affect BS reception too, i.e. adding HVS capabilities may adversely affect your existing EUMETCast reception. If possible, use a second receiver for the HVS reception fed from a dual-output LNB (low noise block). DVB-S2 ReceiverThe receiver which takes the feed from and powers the LNB must be capable of DVB-S2 reception with VCM. Don't worry about the acronyms, there is a list of suitable hardware on the EUMETSAT site in the Devices section. If you already have a full-spec EUMETCast receiver that should be good enough, although you may prefer to have a second receiver for the HVS as mentioned above. I use and recommend that Ayecka SR1 receiver as sold by the GEO Shop. EUMETSAT provide installation guides here. Note that if you are already receiving the EUMETCast Basic Service (BS) correctly, your may need to add the correct MODCOD settings for your Ayecka receiver, and you may wish to review your threshold settings. There is more information here. SoftwareEUMETSAT will supply you with the TelliCast 2.14.2 software, and TelliCast installation is as I describe elsewhere on this site. Note that the earlier TelliCast 2.4.4a software is no longer suitable for the High Volume Service, although it continues to work on the Basic Service. TelliCast configurationFor Sentinel data, sent over the HVS, this is how you might configure your cast-client-channels.inifile to receive just the Sentinel 3A full-resolution data channel. My TelliCast software and the received files are on the separate HD, drive L:, in a directory L:\Tools\EUMETSAT. You will also need to place the temporary files on the same partition as the complete files so that there is no need for TelliCast to copy the data when reception completes, it just needs to alter a directory entry. Add an entry like the one below to the [parameters] section of your cast-client.ini file. As supplied by EUMETSAT: [channel] name=E1H-S3A-01 target_directory=\EUMETCast\received\hvs-1\E1H-S3A-01 tmp_directory=\EUMETCast\tmp\hvs-1 [channel] name=E1H-S3A-02 target_directory=\EUMETCast\received\hvs-1\E1H-S3A-02 tmp_directory=\EUMETCast\tmp\hvs-1 For my own customised version, I have different directory locations and names. I also choose to put all the tmp_directory in a single location rather than specifying it per-channel. This is not unreasonable when there are a small number of files. It's easier for problem-solving, though, if you stick with the EUMETSAT standard if possible. My own version: [channel] name=E1H-S3A-01 target_directory=L:\Tools\EUMETCast\received\Sentinel-3A-EFR[channel] name=E1H-S3A-02 target_directory=L:\Tools\EUMETCast\received\Sentinel-3A-ERR In the cast-client_hvs-1.ini file I specify the tmp_directory location for all channels: [parameters] tmp_directory=L:\Tools\EUMETCast\tmp_2 Limiting the received dataA very simple way to control the amount of data stored is to run my TrimTree software as a scheduled task. My scheduled task contains the lines: TrimTree 3600m L:\Tools\EUMETCast\received * TrimTree 450m L:\Tools\EUMETCast\tmp_2 * Automated processingSoftware requiredThorsten Miglus sent me some notes which I found most helpful as a starting point. I'm using 64-bit Python. Many thanks, Thorsten.
You will also need a program to "untar" the files - and I recommend the 7-Zip program which you can download here. I installed mine in: C:\Tools\7-zip. For performing the histogram equalisation step, I use ImageMagick, which you can download here. Editing the Python file if requiredSimon Proud provided a Python 2.7 script which I was easily able to get working under Python 3.5. My current version of the script is in my Sentinel Tools Zip file which you can download. You might want to play with the band numbers, and I would appreciate any feedback. I hope I haven't broken anything in Simon's script. Many thanks, Simon. Command ScriptThe script has been developed from the ideas and sample scripts posted on the MSG-1 Yahoo group by Ernst Lobsiger, Thorsten Miglus and others. It is intended to be run on a routine basis, and here I run it every 30 minutes (set to start at 00:14, and to repeat indefinitely, in the Task Scheduler). The command script has been developed to be a little more general purpose (you could process the reduced resolution files, for example), so it's split into to parts, the first of which identifies the files to be processed, and the main processing part is a subroutine called from the file selection part. While you don't have to understand every line of the script, you will need to edit the script (e.g. with NotePad) to customise it for your location. The first few lines define a few variables, such as "source_dir", where the full-resolution Sentinel .TAR files live, the "proc_dir" where temporary files will live (note this is a separate hard-disk to the reception hard-disk, and it is not an SSD). Finally, "untar" points to the location of the program which will unpack the TAR (tape archive) files into the multiple NetCDF files they contain. The source directory is then scanned for Sentinel full resolution files, with each detected file name put into the variable "%%G" and used to call the MakeImage routine. The MakeImage routine then parses the supplied file name down into year/month/day hours/minute/seconds time fields, and creates a directory to receive the processed images. "image_dir" includes a hard-coded string which you will need to edit for the root of the processed image tree. If the 3-minute segment has already been processed there is nothing further to do, and the MakeImage routine simply exits, and the main FOR loop skips to the next Sentinel file. Next the .TAR file is unpacked, unpacking only the desired bands (9, 6 and 4 in this case), defined by the strings "*Oa09* *Oa06* *Oa04* -r" at the end of the untar command. A file name for the TIFF output, and for the PNG output from the Pythin script is defined (the TIFF file isn't used here, but you might like to play with that option later), and the Python script is called to convert the three segments bands into a .PNG image. Next I use ImageMagick to perform a histogram equalisation on the image - you may want to tweak this to your own taste (for example, I added a "-sharpen 0.7" which improves the JPG images to my eye), and finally any temporary files created are deleted. At the moment, I keep both the PNG and JPG files, but you might like to add a line deleting the .PNG if you wish. Update: 2016-Dec-09 - Add processing of ERR (reduced resolution) files, helpful as thumbnails, and adds logging of last data processed.
|
|
|