


|
|
A Raspberry Pi Digital Wall Clock
Setting the display sizeAs I was using an analog TV, and not a digital computer monitor, I needed to set the scanning parameters to get the display to just fill the screen. This is a rather fiddly business as a reboot is required after each change, so progress is not very fast! I used the testcard program from the Zip archive to check the screen coverage. I ended up with the following changes to /boot/config.txt. Your values will be different. For more options see http://elinux.org/RPi_config.txt sdtv_mode=2 # PAL system sdtv_aspect=3 # set 16:9 aspect ratio overscan_left=-5 # scan margin adjustments overscan_right=-30 overscan_top=-20 overscan_bottom=-20 With those settings, the available display area is 928 x 552 pixels, an aspect ratio of 1.68:1, compared to the theoretical 1.78. This on a NextBase 10.2-inch 800 x 480 pixel analogue TV. Running a program automaticallyOriginally, I had intended to write a screen-saver, so that the digital clock would be displayed when the display was otherwise not in use. However, I could not find a digital clock screensaver which suited me, the examples in C which I could find were too complex to modify quickly, and I could find no examples in my preferred object Pascal language. Following helpful discussions with Stefan Enziger, Jasen Betts and others on the comp.sys.raspberry-pi Usenet newsgroup, I decided that making a program start automatically from the graphical desktop would be easier (like adding a program to the Startup group in Windows). Auto Login at boot timeThe next step was to make the Raspberry Pi automatically log me in as a user (at the main desktop) when the Pi was booted. There are instructions here. Condensed: Auto Login: Edit /etc/inittab Scroll down to: 1:2345:respawn:/sbin/getty 115200 tty1 Change to: #1:2345:respawn:/sbin/getty 115200 tty1 Under that line add: 1:2345:respawn:/bin/login -f pi tty1 </dev/tty1 >/dev/tty1 2>&1 Save the file and exit [Optional] Install xscreensaver and set one. [Required] Set to boot to GUI mode with: sudo raspi-config To check this has worked, simply reboot the Raspberry Pi and watch for the desktop to appear. You can go a little further and install a package of screensavers, set one with, say, a 1 minute timeout, and check that the screen-saver activates at one minute past desktop start time. Remember to set the screen-saver back to None for the wall-clock program, though! To add screen-savers to your Raspberry Pi apt-get install xscreensaver and you should now find a new item on the desktop Preferences menu => Screensaver. Update for Rasbian JessieRaspbian Jessie no longer uses the /etc/inittab method of starting programs. This page:
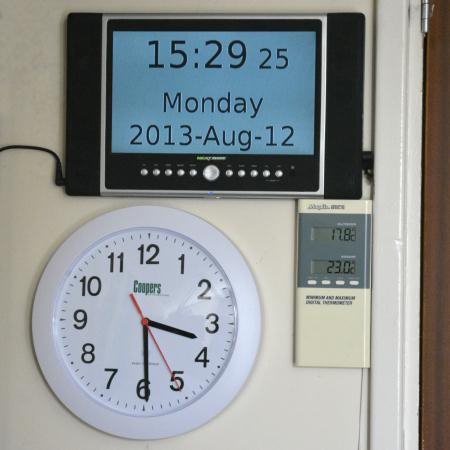
has some tips, and recommends searching Google with: raspbian jessie auto login Running a program when the desktop appearsThis is a little more complex, and involves creating a file to run the program of your choice. First, if you haven't already compiled the program DigitalClock, you will want to extract it from the Zip archive and make it executable: chmod +x DigitalClock On my Raspberry Pi, I had created a directory lazarus from the home directory (which therefore had the path /home/pi/lazarus), and placed the DigitalClock program and its source code there. With the File Manager accessory, you should be able to run the DigitalClock program, and check that you see something resembling the photo at the start of this note. Move the mouse and click anywhere to end the program. Creating the required autostart fileUnfortunately, it's not as simple as on Windows - where you can create a shortcut to the program in a Startup directory. You need to create a file named DigitalClock.desktop, in the directory .config/autostart under your home directory. By default, that directory does not exist on a new Raspberry Pi installation, so you could use the following commands from http://www.raspberrypi.org/phpBB3/viewtopic.php?t=18968 to create it and make a file to configure the DigitalClock startup:
You can then edit the contents of the DigitalClock.desktop file - only a few lines are required: [Desktop Entry] Name=DigitalClock Exec=/home/pi/lazarus/DigitalClock Terminal=False Type=Application The Exec= should point to the full path of the DigitalClock executable file. If you want to know more about entries in the .desktop file, look here. Compiling the DigitalClock softwareIf you want to compile the software, for example should you want to make some changes to suit your own needs, you will need to install the FreePascal compiler (fpc), and the Lazarus development system. It's not as speedy as Embarcadero's Delphi on a Windows PC, but developing a small program like this is perfectly feasible on the Raspberry Pi. As fpc/Lazarus is also available for Windows, you could develop and test on Windows (or the Apple Mac), and then transfer the source for the .pas and .lfm files to the Raspberry Pi. I ended up creating skeleton applications on the Raspberry Pi, adding event handlers to the form, and cutting and pasting the code for the event handlers from my Windows version to the Raspberry Pi. For these short programs, typing the code in by hand is straight-forward enough. Installing LazarusI followed the discussion here, which led to this most helpful page, getting a more recent version of Lazarus than that in the default Raspberry Pi Raspian OS. [Is this still the case?] Thanks to Jack for that page and package. Once installed, Lazarus should appear as a new entry on the desktop Programming menu. One hint, to keep the size of the executable down, is to disable the debug information in the Project, Project Options ..., Compiler Options, Linking menu, uncheck Generate debugging info. Executable size is about 2 MB without the debug info, 15+ MB with! For help with Lazarus, try this Usenet group: which is also available through a mailing list. How to test while developingMy procedure has been this: I log in via an X-Windows server for Windows (ming) using PuTTY for authentication and can thus access the Lazarus IDE, to edit and compile and run the program. This produces output on the X-Windows server running on the PC, completely separately from any display running on the TV. I can also be logged in remotely from my PC via SSH to a console session, and run the graphics program to produce output on the TV screen by telling the SSH session where to display its output: export DISPLAY=:0 Thanks to Stefan Enziger for that nugget! Of course, you can't overwrite a program which is being actively run by the Raspberry Pi on the TV, so for that reason you may want to have a separate copy of the program which you auto-start. I was slightly surprised to find that even though I had the DigitalClock running via autostart, I could still run the TestCard program to confirm the resolution figures I mentioned above. Updates
The downloads include full source code. Future enhancementsAt the moment, the screen brightness is fixed. It would be nice to be able to adjust it live. As well, perhaps for astronomy enthusiasts, a darker red text on a very dark grey background would be useful. You have the working source code, so .... it's over to you! One minor tweak concerns the Free Pascal "Now" function. I noticed that over the clock change in the Autumn my wall clock continued to display summer time rather than winter time - my guess is that the Now function doesn't check for a change in the minutes offset very frequently, if at all since it was first called. Restarting the program fixed the problem, but it would be nice to have the fix in the code. What else have I done with the Raspberry Pi?
AcknowledgementsMy knowledge of Linux is very limited, but at least I am learning a little due to my purchase of the Raspberry Pi. This project would have been impossible without the patient help of folks on various mailing lists and Usenet newsgroups, to whom I am very grateful. Offering this Web page and my software is my way of actively saying many thanks! |
|
|